How to Build a Pergola a Step-by-Step Guide

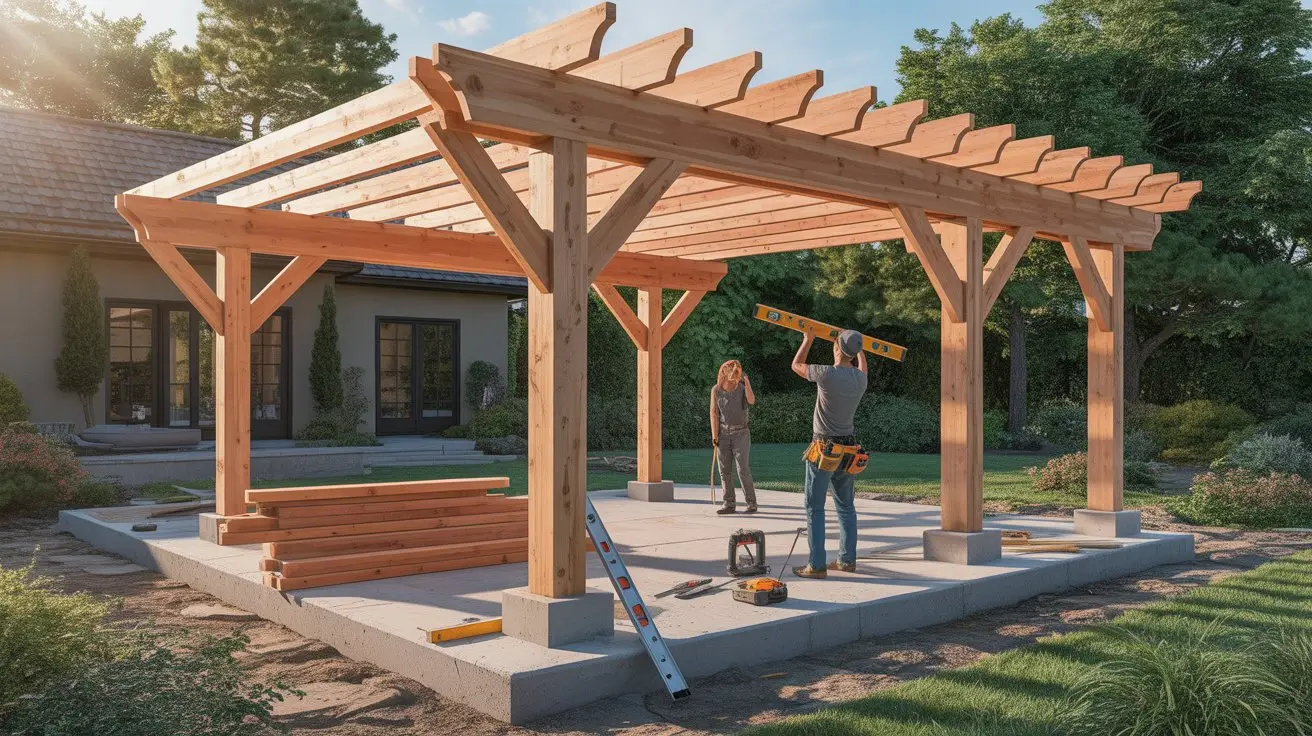
Building a pergola is one of the most rewarding DIY projects you can tackle, it extends your living space outdoors and becomes an instant focal point. This How to Build a Pergola a Step-by-Step Guide walks you through planning, materials, and construction steps so you can build a freestanding or attached pergola that looks professional and lasts for years.

Overview: What you will learn
This guide covers design choices, required tools and materials, permitting basics, and a clear, numbered construction sequence. Use this How to Build a Pergola a Step-by-Step Guide to estimate costs, schedule the work, and avoid common mistakes.
| Image | Product | Rating | Price |
|
Our Pick
 |
Louvered Pergola |
5
|

Tools & materials checklist
Before you begin, gather everything you’ll need. Refer back to this list while you work through the steps in this How to Build a Pergola a Step-by-Step Guide.
- Materials: pressure-treated posts (4×4 or 6×6), beams (2×8 or 2×10), rafters (2×6), cross slats, galvanized bolts, post anchors or concrete, joist hangers, wood screws, exterior-grade wood glue, wood stain/sealant.
- Tools: circular saw, drill/driver, impact driver, post hole digger or auger, level, tape measure, framing square, chalk line, sledgehammer, ladder, clamps.
- Safety: gloves, eye protection, hearing protection, respirator if cutting treated wood.
Planning and permits
Good planning prevents costly mistakes. Here’s what to do during planning in this How to Build a Pergola a Step-by-Step Guide:
- Decide freestanding vs attached: Freestanding pergolas sit away from the house; attached pergolas fasten to your siding or a ledger board.
- Measure and sketch: Typical backyard pergolas are 10–12 feet wide and 12–16 feet long, but size should match your patio and use.
- Check local codes: Many areas require permits or have rules about setbacks. Always verify before digging post holes.
- Choose a wood type: Cedar and redwood resist rot and insects; pressure-treated pine is budget-friendly.

Step-by-step build process
Step 1: Mark and prepare the site
Use stakes and string to outline the pergola footprint. Verify corners with the 3-4-5 triangle method for square lines. This first practical step in How to Build a Pergola a Step-by-Step Guide ensures proper alignment.

Step 2: Set post locations and footings
Dig post holes (typically 24–36″ deep depending on frost line). For a permanent pergola, pour concrete footings or use anchored post bases on concrete pads. Accurate, level footings are essential, this stage makes or breaks the structure.

Step 3: Install the posts
Stand posts in the footings or anchors and temporarily brace them. Use a level to check plumb on all sides. Secure posts with bolts or concrete. In this How to Build a Pergola a Step-by-Step Guide, take your time to plumb and square the posts; adjustments later become costly.

Step 4: Attach beams and ledger (if attached)
If building attached, fasten a ledger to the house and secure beams to it. For freestanding pergolas, notch beams into the posts or use metal post-to-beam connectors. Use carriage bolts and washers for solid connections.

Step 5: Add crossbeams and blocking
Install the main crossbeams that span the pergola. Add blocking between beams for rigidity. This framework creates the strong skeleton described in How to Build a Pergola a Step-by-Step Guide.

| Image | Product | Rating | Price |
|
Our Pick
 |
Wooden Gazebo |
5
|
Step 6: Install rafters and slats
Lay rafters perpendicular to the beams, typical spacing is 12–18 inches depending on desired shade. Add thinner slats across rafters if you want tighter shade. Secure rafters with joist hangers or through-bolts for long-term stability.

Step 7: Bracing and finishing touches
Add diagonal braces at beam-post connections to reduce sway. Sand rough edges, predrill holes for screws to avoid splitting, and fill all exposed hardware holes with wood filler where desired. This finishing stage in the How to Build a Pergola a Step-by-Step Guide makes your pergola both sturdy and beautiful.

Step 8: Stain, seal, and accessorize
Apply exterior stain or sealant to protect against moisture and UV. Install lighting, hanging plants, or retractable canopies to personalize the space. Proper finishing extends the life of the pergola and completes the steps in this How to Build a Pergola a Step-by-Step Guide.

Tips, tricks, and safety
- Double-check measurements. Measure twice, cut once, this old rule saves lumber and time.
- Use corrosion-resistant fasteners. Galvanized or stainless hardware prevents rust stains.
- Plan for drainage. Grade the site so water won’t pool at posts.
- Bring a helper. Posts and beams are heavy, two people make the job safe and accurate.
- Consult a pro for complex loads. If you plan to mount a heavy canopy or a rooftop garden, ask an engineer.
One final practical note to close this How to Build a Pergola a Step-by-Step Guide: always follow local building codes, and if in doubt about structural safety, hire a licensed contractor for critical stages.
Maintenance and longevity
A well-built pergola lasts decades with minimal care. Re-stain every 2–3 years, check hardware annually, and replace any rotted wood promptly. Regular upkeep preserves both safety and aesthetics and is an important follow-up to any How to Build a Pergola a Step-by-Step Guide project.

Final thoughts
Following this How to Build a Pergola a Step-by-Step Guide gives you a clear road map from planning to finishing. With accurate measurements, quality materials, and attention to safety, you’ll create a durable and beautiful outdoor structure that adds value and enjoyment to your home. Ready to build? Gather tools, check local rules, and start with a solid plan — your new pergola is waiting.