
How to Create Stunning Garden Art: A Step-by-Step Guide

Your garden is more than just plants and flowers, it’s a canvas waiting to be transformed into a work of art. With creativity and the right guidance, you can turn any outdoor space into a personalized sanctuary filled with charm and character. In this step-by-step guide on how to create stunning garden art, we’ll walk through ideas, materials, and easy techniques that allow you to showcase your personality in your backyard.
Whether you’re looking to make simple DIY decor or ambitious artistic features, garden art enhances both beauty and functionality, making your space truly unforgettable.

Step 1: Define Your Vision and Style
Before diving into projects, think about the mood and aesthetic you want. Do you prefer a whimsical, colorful garden or a minimalist, natural vibe? Some common styles include:
- Rustic charm: Using reclaimed wood, stone, or metal pieces.
- Modern elegance: Sleek sculptures, abstract art, or clean geometric lines.
- Whimsical playfulness: Bright colors, mosaics, or quirky handmade pieces.
- Natural harmony: Organic designs blending into the greenery.
Having a clear vision ensures your garden art complements your plants and landscape design.

Step 2: Gather Materials and Tools
The materials you use will shape your creations. Some popular options for garden art include:
- Wood: Great for rustic signs, furniture, or carved pieces.
- Metal: Perfect for sculptures, trellises, or repurposed items.
- Glass: Ideal for mosaic tiles, glass beads, or recycled bottles.
- Stone & Pebbles: Used for pathways, painted rocks, or borders.
- Ceramics & Clay: Handmade pots, sculptures, or wind chimes.
Basic tools you may need: hammer, nails, paintbrushes, glue, protective finishes, and safety gear.

Step 3: Choose Your First Project
If you’re just starting, pick an easy project to gain confidence. Here are some beginner-friendly ideas:
- Painted Rocks: Use them as plant markers or playful accents.
- Mosaic Planters: Decorate old pots with broken tiles or glass.
- Garden Signs: Personalize your space with wooden or metal signs.
- Wind Chimes: Create soothing sounds with shells, bamboo, or metal.
For advanced projects, consider sculptures, stepping-stone pathways, or large wall murals.

Step 4: Add Color and Texture
Color transforms any outdoor space. Bright paints, stained wood, or colorful mosaics can make your garden pop. Don’t be afraid to mix textures, smooth stones, rough wood, and shiny glass create depth and visual interest. Pro tip: choose outdoor paints and weatherproof finishes to ensure longevity.

Step 5: Blend Art with Nature
The best garden art feels like a natural part of the environment. Place sculptures near shrubs, tuck painted rocks along pathways, or use trellises covered in climbing plants. This creates harmony between art and greenery rather than making them compete.

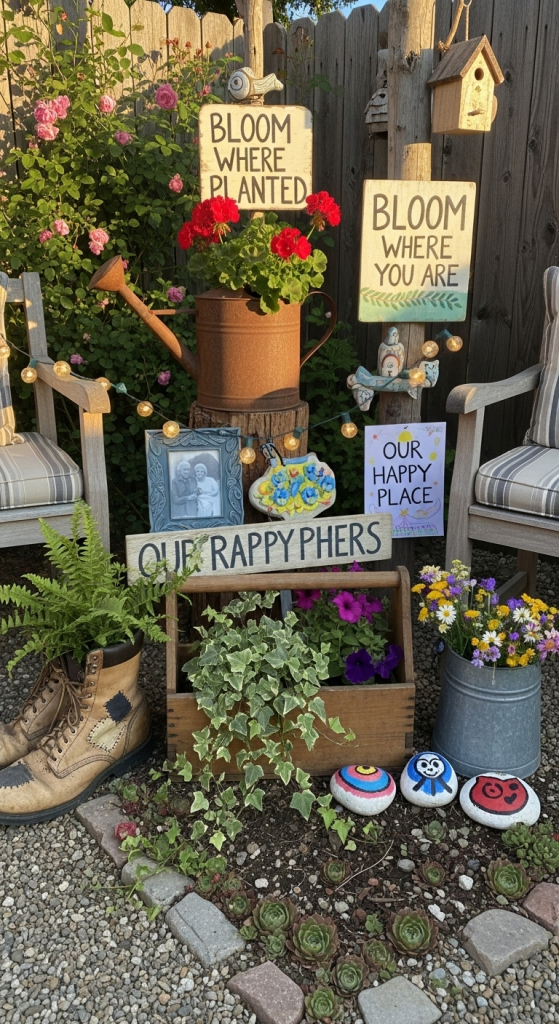
Step 6: Add Personal Touches
Your garden art should reflect your personality. Incorporate:
- Recycled or sentimental items (old tools, family heirlooms, or keepsakes).
- Hand-painted designs with symbols or quotes you love.
- Seasonal pieces, like holiday-themed accents or spring floral art.
These details make your garden feel uniquely yours.
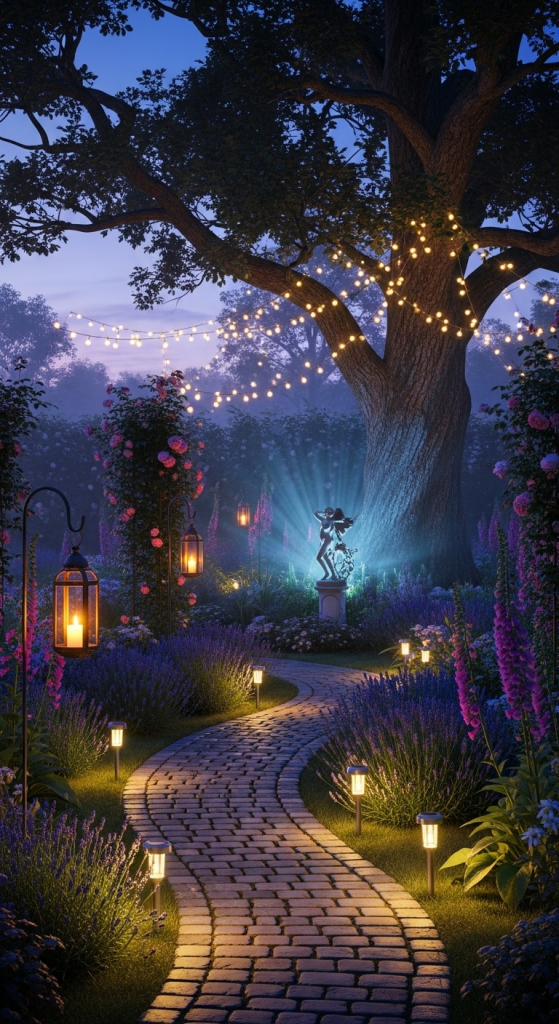
Step 7: Light It Up
Garden art becomes even more magical with the right lighting. Options include:
- Solar lights: Eco-friendly and easy to install.
- Lanterns or string lights: Add warmth and coziness.
- Spotlights: Highlight sculptures or statement pieces.
Lighting ensures your creations shine both day and night.
Step 8: Protect and Maintain
Since garden art is exposed to the elements, protection is key.
- Apply waterproof sealants to painted surfaces.
- Use rust-resistant finishes on metal.
- Bring delicate items indoors during harsh weather.
Regular care will keep your art looking stunning for years.

Step 9: Expand and Evolve
Once you’ve mastered a few projects, keep experimenting! Try new techniques, mix mediums, or add larger installations. Garden art is not static, it grows with your creativity and your garden’s evolving design.

Inspiring Garden Art Ideas to Try
- Bottle Trees: Add colorful glass bottles to a tree frame.
- Vertical Wall Art: Hang mosaics or painted panels on fences.
- Upcycled Furniture: Turn old chairs into planters.
- Mirror Accents: Add depth with weather-resistant mirrors.
- Fairy Gardens: Create magical mini landscapes with small figurines.
Final Thoughts
Designing a garden is more than just arranging plants, it’s about creating an outdoor sanctuary that inspires joy and creativity. With this step-by-step guide on how to create stunning garden art, you now have the tools and inspiration to personalize your space. Whether through painted rocks, mosaic pathways, or whimsical sculptures, your garden can become a living gallery that reflects who you are.
Start small, stay creative, and let your imagination bloom alongside your plants.


